GPON Home Gateway Login Guide: Easy Access and Setup
Need help logging into your GPON Home Gateway? Whether you’re setting up your internet for the first time or tweaking your Wi-Fi settings, this guide will walk you through it all. Let’s dive in!
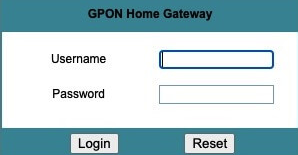
How to Log In to Your GPON Home Gateway
- Connect to Your Network:
Use a Wi-Fi connection or plug in an Ethernet cable to your GPON router. - Open a Browser:
Launch your web browser (Chrome, Firefox, Safari—you name it!). - Enter the Default IP Address:
Type192.168.1.1or192.168.100.1into the browser’s address bar and press Enter. - Enter Login Credentials:
- Username: admin
- Password: admin or password (Check the label on your router if these don’t work.)
If you’ve changed the login details and forgotten them, a reset may be needed.
- Access the Admin Dashboard:
Now you’re in! From here, you can configure internet settings, change your Wi-Fi password, and manage security features.
Troubleshooting Login Issues
- Forgot Your Password? Hold the reset button for 10-15 seconds to restore factory settings.
- IP Not Loading? Ensure you’re connected to the correct network and try another browser.
- Still Can’t Access? Use the Command Prompt (Windows) or Terminal (Mac/Linux) and type
ipconfigorifconfigto check the default gateway.
How to Change Wi-Fi Name and Password
- Log in to the admin panel.
- Go to Wireless Settings or Wi-Fi Settings.
- Edit the SSID (network name) and Wi-Fi Password.
- Save the changes and reboot if necessary.
Update GPON Router Firmware for Better Performance
- Navigate to System Tools > Firmware Upgrade in the admin panel.
- Download the latest firmware from the official GPON website.
- Upload it and follow the prompts to complete the update.
Keeping your firmware updated improves security and performance!
Final Thoughts
And that’s it! Accessing and managing your GPON Home Gateway is pretty straightforward. Whether you’re securing your network or optimizing your connection, these simple steps make it easy.