Struggling with patchy Wi-Fi in certain corners of your home? Don’t worry—NETGEAR Wi-Fi extenders are here to save the day, and Mywifiext.net is the key to unlocking their full potential. This web-based admin panel helps you log in, configure settings, and extend your Wi-Fi network effortlessly. Let’s break it down step by step.
What Is Mywifiext.net?
Simply put, Mywifiext.net is the gateway to your NETGEAR extender’s settings. Whether you want to change your Wi-Fi password, update the network name (SSID), or tweak the default settings, this tool lets you do it all.
If you prefer using an IP address, you can also log in via 192.168.1.250. Either way, it’s your go-to solution for managing your Wi-Fi extender.
How to Set Up Your NETGEAR Extender via Mywifiext.net
Getting your NETGEAR extender up and running is easier than you might think. Just follow these steps:
- Connect to the Extender’s Wi-Fi Network
- Look for a network called NETGEAR_EXT in your device’s Wi-Fi list.
- Most of the time, this network doesn’t have a password. If it does, use the default password: password.
- Open the Setup Page
- Launch your favorite web browser and type mywifiext.net into the address bar.
- Start the Setup Process
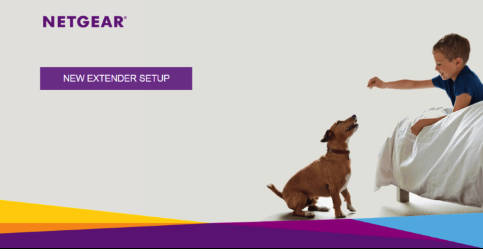
- On the page that opens, click NEW EXTENDER SETUP.
- Create an account by entering your email, a secure password, and answers to a security question. Once you’re done, hit NEXT.
- Connect to Your Router
- If you see a prompt that says, “Your WiFi extender is not connected to the router,” just click YES to proceed.
- Choose Your Wi-Fi Network to Extend
- Select your current Wi-Fi network from the list.
- If you don’t want to extend both 2.4GHz and 5GHz bands, you can deselect one before clicking NEXT.
- Enter Your Router’s Password
- Type in the password (network key) for your existing Wi-Fi network(s) and click NEXT.
- Set Up Your Extended Network
- Name your new extended Wi-Fi network (SSID) and choose a password. You can:
- Use the same password as your main network.
- Set a different password.
- Leave it open (not recommended for security reasons).
- Name your new extended Wi-Fi network (SSID) and choose a password. You can:
- Finish the Setup
- Once you’ve completed the steps, connect your device to the new extended network and click CONTINUE. Your Wi-Fi extender is now ready to boost your internet coverage!

Troubleshooting Mywifiext.net Access Issues
Can’t access Mywifiext.net? It’s a common hiccup, but no worries—we’ve got you covered. Here’s how to fix it:
- Check Your Connection
- Make sure your device is connected to the extender’s Wi-Fi (NETGEAR_EXT) or that your router and extender are properly linked.
- Try Alternate Addresses
If Mywifiext.net isn’t working, give these options a shot:- Windows:
http://mywifiext - Mac/iOS:
http://mywifiext.local - Android:
http://192.168.1.250
- Windows:
- Bring Devices Closer
- During setup, place your extender and router in the same room. Once the connection is established, you can move the extender to its final location.
- Ensure the Extender is Powered On
- Double-check that the extender is plugged in and turned on.
- Clear Browser Cache
- Sometimes, all you need is to clear your browser’s cache or switch to a different browser.
- Use an Ethernet Cable
- For a more stable connection, plug your computer directly into the extender with an Ethernet cable.
Final Thoughts
Setting up your NETGEAR range extender through Mywifiext.net is quick and easy. With this guide, you’ll not only boost your Wi-Fi coverage but also take control of your home network settings like a pro.
So, don’t let dead zones slow you down. Get your extender up and running today, and enjoy seamless connectivity in every corner of your space. If you found this guide helpful, share it with a friend who might be struggling with their Wi-Fi setup—it could make their day!